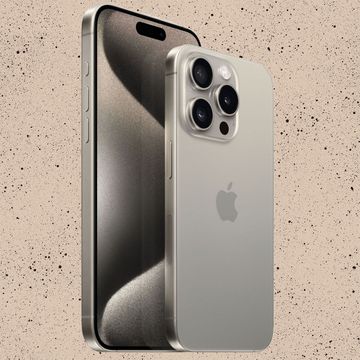
If it’s time for you to upgrade your iPhone, you may well be looking at the shiny new models due to be announced this evening (10 September). But the current crop still hold up as some of the best smartphones out there, especially if you're staying loyal to Apple.
Despite being the budget option when it was released last year, the iPhone XR has been more popular than the expensive high-end iPhone XS and XS Max. It's not hard to see why.
The iPhone XR is stuffed full of features to make it just as appealing as the flagship models. It’s got a high-resolution edge-to-edge display, powerful specs, and the longest-lasting battery of the iPhones released last year. Most importantly, it has the same great camera as the XS and XS Max, but with some added benefits.
Portrait mode on the iPhone XR
Almost all of the latest smartphone models come with a ‘portrait mode’ feature. This, essentially, enables you to blur out the background of your snaps. It’s a feature that’s designed to mimic the look of professional lenses that photographers use on mirrorless and DSLR cameras.
Many phones use two camera lenses on the back to gather as much depth information as possible. Unlike the iPhone XS, though, the XR has just a single camera. This means that it creates a portrait mode effect using software methods that allow it to calculate depth.
The benefits and drawbacks
While the XR captures much less depth information, Apple’s algorithms impress in blind comparisons. In the right circumstances, the XR can deliver even better photos than some of its rivals, including even Google’s Pixel 3. It was awarded top-ranked single-lens phone by camera evaluators DXOMark in December 2018. There are also some ways that it’s better than the XS.
Because the shallow depth-of-field mode relies on software rather than an extra camera lens, you’ll find you can stand at a normal distance from a subject. Users of the iPhone 7 Plus, 8 Plus, X or XS and Max will be all too used to the phone’s alert to ‘move further away’ from a subject – and this won’t be an issue on the XR.
The phone also outperforms the high-end models for low-light portrait photos. One drawback? The software just works on humans. It’ll struggle to take Portrait mode photos of pets or other stationary objects as it won’t be able to identify a face. If the XR doesn’t detect a face in a portrait mode photo, the camera app will warn you with a “no face detected” error alert.
Beyond portrait mode
You won’t always be using portrait mode, especially for most regular photos, including food snaps, larger group photos and landscape scenes. The iPhone XR includes Apple’s ‘Smart HDR’ technology (HDR stands for ‘high dynamic range’) that’ll use artificial intelligence to bring more depth out of the shadows and highlights in your images. Behind the scenes, the phone is taking multiple shots and combining them to get more out of your images.
Five tips for better smartphone photos
1 | Turn off flash
This is a simple fix, but not necessarily an obvious one. While it’s designed to brighten up your subject, flash is actually detrimental for a lot of images. Direct light blasted at a face tends to make it look washed out and expose all of its blemishes and spots, whereas natural light is much kinder to your subject in portraits. Turning off the flash will help with almost all your photos, as it has a habit of ruining not only portraits but other low-light still life photos.
2 | Simple composition rules
Rules are made to be broken, but it can’t hurt to pay attention to the rules of composition that have served photographers well for years. Think about the end result when you’re taking the photo. If you want to crop it to a square for your Instagram feed, try to keep your subject in the centre and aim for a frame that’s not too full of clutter. Think about the ‘rule of thirds’ when taking either taller photos and wider shots. Turn on the grid overlay on your screen and try to compose your photo by putting points of interest where the lines cross.
3 | Look for the light
Lighting can make or break your photo, so think about when you’re taking your photo. Images shot during ‘magic hour’ (when the sun is rising) and ‘golden hour’ (when the sun goes down) are almost guaranteed to look stunning. If you have less control over the light, try to make sure the light source is behind you and lighting your subject, rather than behind the subject and spoiling your shot. A handy tip is that you can tap the screen and then slide your finger up and down to brighten or darken the image. If the person you’re taking of photo of looks too dark or shadowy, tap on them and the iPhone will try to brighten things up.
4 | Sharpen up your editing
Don’t shy away from editing your photos, you’re only doing yourself a disservice by going #nofilter. This is where you get to add your artistic touch and make the image your own. Usually, some small and subtle adjustments go a long way. Avoid pushing any of the sliders in any editing app too far. Just a couple of tiny tweaks to light and the colour of an image can make a huge difference.
Using the editing controls on the iPhone’s Photos app is a good start, but apps like Darkroom and Snapseed are worth downloading and let you edit RAW images (more on those below). The Instagram app itself has a surprisingly good suite of editing tools, and the main thing you should strive for when editing is a consistent approach to all your images (that’s what sets many of the Instagram profiles you love apart from the others).
5 | Shoot in RAW
Shooting in RAW may sound like complicated photography jargon, but all it really means is shooting an image as a different file type that contains much more information. RAW images are far better for editing as you’ll find you have greater control over the light and colours in your photo. They’re also a larger file size, but you could export the RAW image after it’s edited to deal with this. iPhones don’t let you shoot RAW in the default camera app, but Obscura 2 (£4.99), Halide (£5.99) and MuseCam (£3.99) are all great RAW camera apps that shoot images you can edit in the editing apps recommended above.
You’ll find these typically cost a couple of pounds, but you can get some, like RAW+, for free. Most professional photographers will use Adobe Lightroom to edit photos, and you can actually use a lot of Lightroom’s features – including shooting and editing RAW files – for free (after setting up an Adobe login) on the phone version of the app. There are some limitations but it gives you a surprising amount of features without any cost. If you want to get all of Lightroom's features, it costs £9.98 a month and comes with a very reasonable 1TB of cloud storage.
Note: we earn a commission for products purchased through some of the links in this story.
Like this article? Sign up to our newsletter to get more delivered straight to your inbox


